
# 1.1 Maven Basics
It is recommended to use maven for developing jfinal projects, instead of manually managing jar packages and building projects in the traditional way. Since maven is widely used, there are many maven-related resources available online. Therefore, this section only introduces a few basic points of using maven. Knowing these points is sufficient to get started with jfinal.
# 1. Download
Visit the Maven official download page: http://maven.apache.org/download.cgi (opens new window)
Click on apache-maven-3.6.3-bin.zip to download. It is recommended to download at least version 3.6.3, as higher versions are more stable.
# 2. Installation
Extract maven to a directory, configure some environment variables to complete the installation. The configuration of environment variables is similar to the configuration of JDK. Only two environment variables need to be configured. Below is an example of configuration in a Linux system:
export MAVEN_HOME=/Users/james/app/maven
export PATH=$PATH:$JAVA_HOME/bin:$MAVEN_HOME/bin
2
As shown above, put the above two lines of code in /etc/profile.
or in the ~/.bash_profile file to complete the installation of Maven. After configuring the above environment variables, use the source /etc/profile or source ~/.bash_profile command to activate them.
For configuring environment variables in Windows, refer here: Portal A (opens new window) and Portal B (opens new window)
Finally, open the command line and enter the following command to check if Maven is successfully installed. If successful, it will display the Maven version number:
mvn -v
# 3. Configure Eclipse to Point to Maven
Eclipse itself comes with an embedded Maven, but the embedded Maven is not reliable and is not convenient, such as not being able to use Maven's command line in the console. So never use the Maven embedded in Eclipse. Below is a brief introduction to the configuration method:
Open the configuration main window and click on the Installations submenu under Maven on the left.
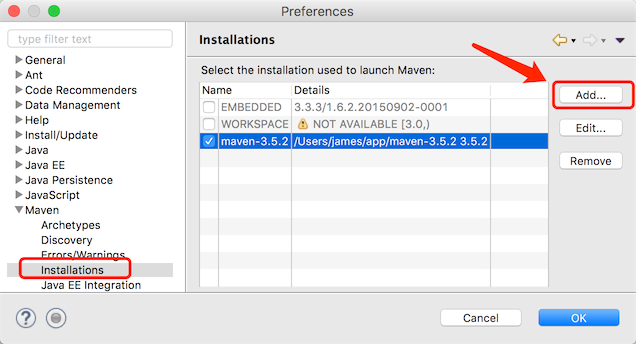
Click the add button in the above figure to pop up the following window:
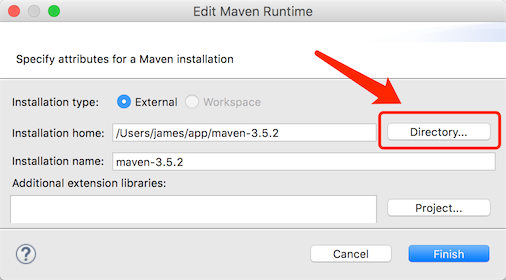
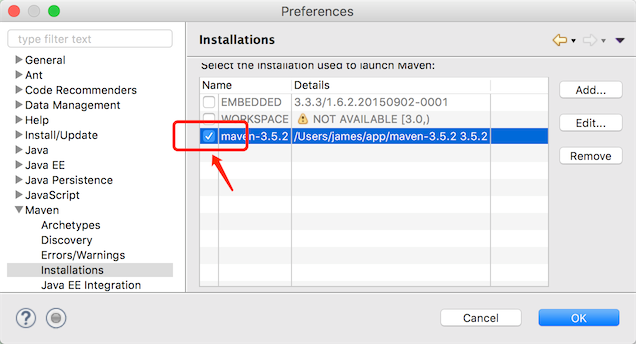
Click the Directory in the above figure to select the directory where Maven was extracted, check the just-added Maven, and uncheck the other two Maven options, only keep the one just installed checked.
Finally, click on the User Settings menu on the left, and then click the Browe button on the right to configure the two settings.xml files. These two files are under the conf subdirectory of the Maven installation directory.
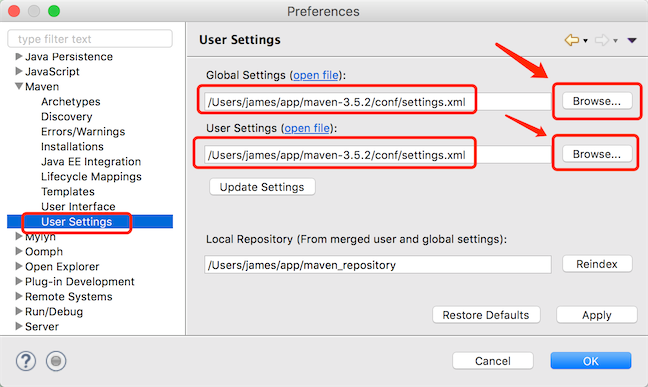
Click the ok button to complete the configuration.
# 5. Import the Maven project into Eclipse
Many students find it difficult to use the jfinal demo after downloading it from the homepage and importing it into Eclipse/IDEA. The essential reason is the incorrect method of importing.
The key point in importing a Maven project is to treat it as a Maven project and import it through the "Maven Import Wizard."
Below are screenshots of the import process. The first step is to check whether the root directory of the project being imported is clean:
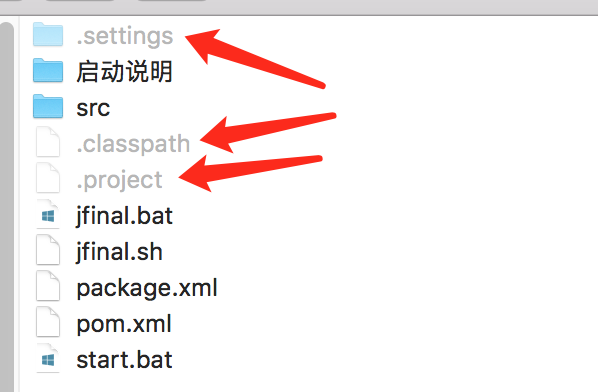
The presence of the .settings directory, as well as the .classpath and .project files (note they are hidden files) in the above screenshot, proves that the project has already been imported into Eclipse. Therefore, there's no need to re-import; simply select "Existing Projects into Workspace" in the import window to reopen the project.
If the project is not working, you can delete the aforementioned directories and files and then import them according to the method described in the document below.
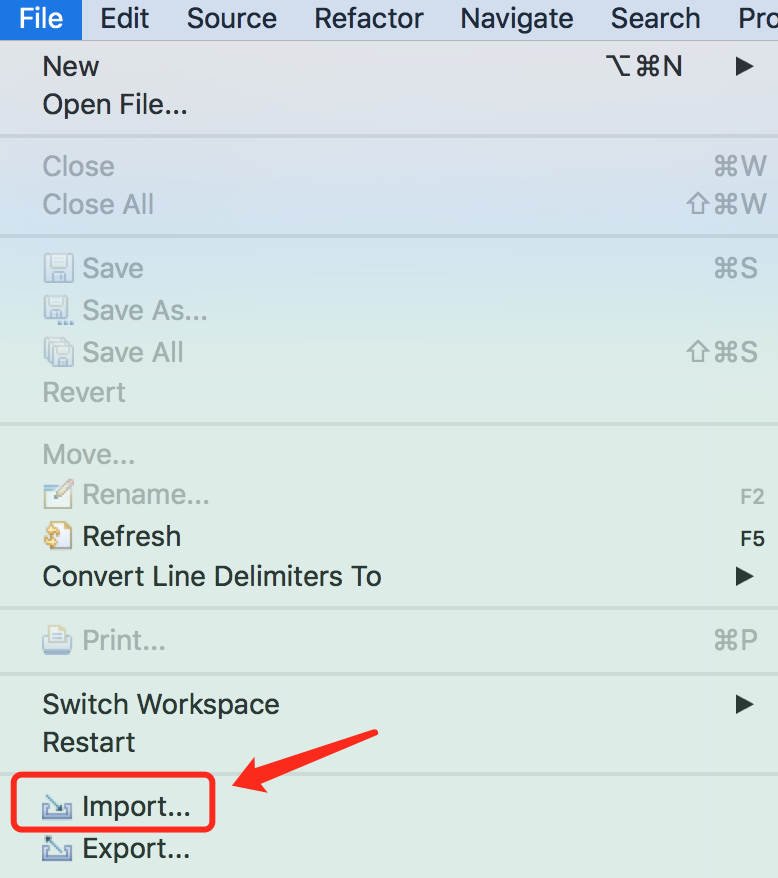
If the above directories and files do not exist in the project root directory, the Maven project needs to be imported:
The crucial step is to choose "Existing Maven Project":
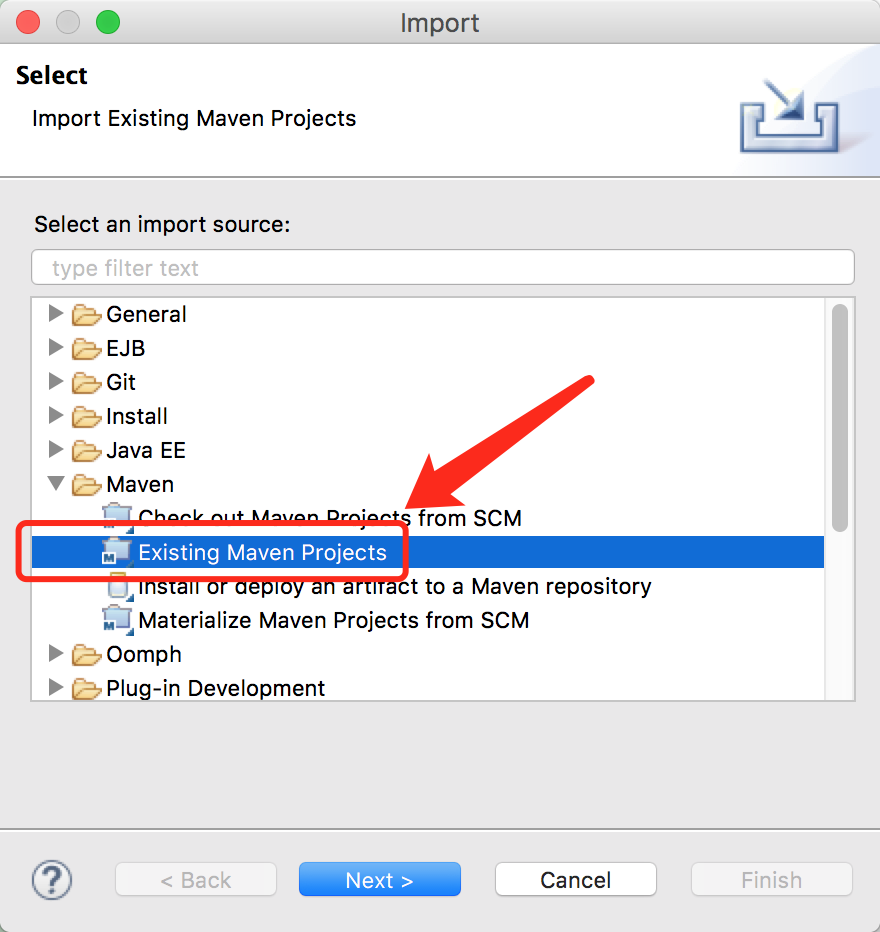
If you don't import it as a Maven project, Eclipse won't generate the correct .settings, .classpath, .project, etc., configurations, causing the project to be unusable (similarly, this applies to the IDEA development environment).
The final step is to select the directory where the project is located. Ensure you choose the directory where the pom.xml is located:
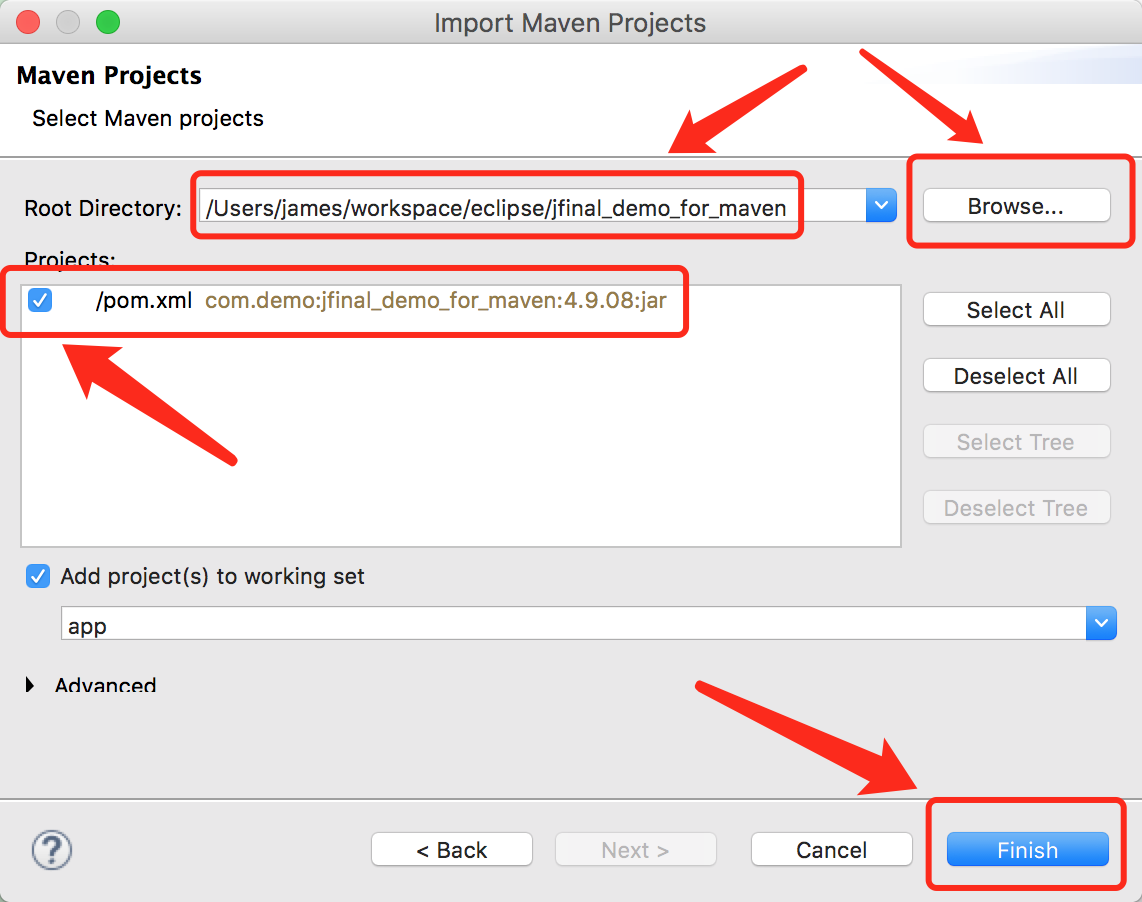
Click the "Finish" button to complete the import of the Maven project.
A standard Maven project only requires the src directory and the pom.xml file.